Guide to the interface of the Cinelook plugin
Workflows
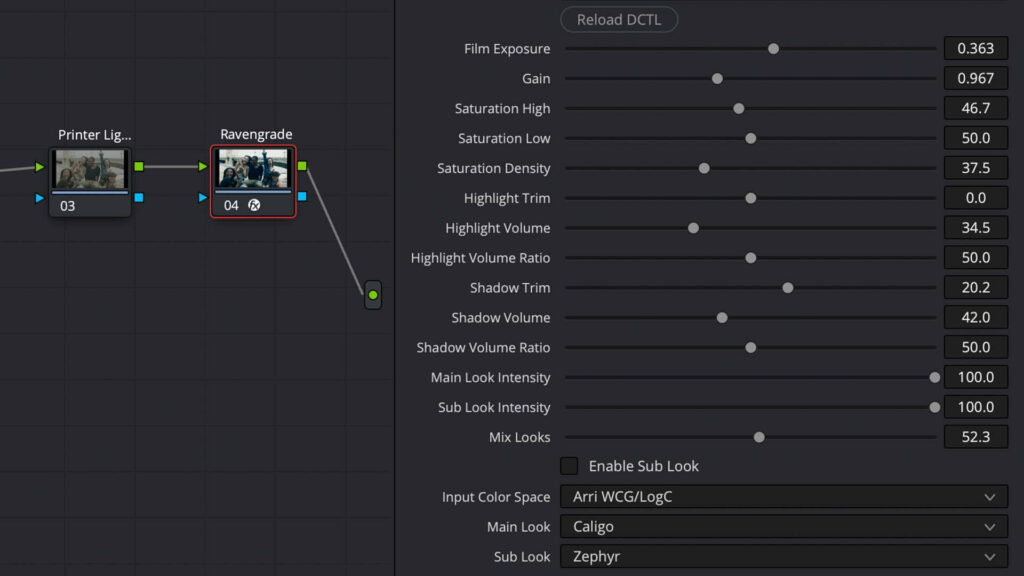
Overview of the Cinelook controls
Input Color Space
Main Look
Sub Look
Enable Sub Look
Activate the Sub Looks by enabling this checkbox.
Mix Looks
Mix between the Main and Sub looks to get access to countless look variations. Remember to enable the “Enable Sub Look”-checkbox to make this work.
Main Look Intensity
Scales the intensity of the Main Look. This is especially useful when mixing looks.
Sub Look Intensity
Scales the intensity of the Sub Look. This is especially useful when mixing looks.
Film Exposure
Gain
Lift
Controls the low end contrast.
Cool/Warm
A LAB color space based temperature control.
Tint
Magenta vs. green balance.
Saturation High
Control how much saturation is introduced in the upper luminance range. The effect of the control varies based on how much luminance is available in the image, and overlaps slightly with “Saturation Low” to ensure a gentle transition and avoid artifacting.
Vibrance
Control how much saturation is introduced in the lower luminance range, but not in the absolute blacks. The effect of the control varies based on how much luminance is available in the image, and overlaps slightly with “Saturation High” to ensure a gentle transition and avoid artifacting.
Saturation Density
Determines how dark or bright the colors are as we saturate them. The tool allows to give the higher saturation a more subtractive and filmic quality when slided from left to right. The effect of the control varies on how much high-saturation is available in the image.
Channel Density Control
Color channel controls that darkens and lightens the individual color channels without shifting the luminance. Useful for enhancing skin tones, adding texture and depth by separating parts of the image by bringing what is most valuable to the front.
Highlight trim
Pull in og stretch out the peak highlights for a gently roll off. The effect of the control varies based on the luminance range of the image.
Highlight volume
Reducing contrast in the upper end of the image to create richer and thicker whites. Mimic the popular effect of playing the lift and gain against each other inside of a highlight key. Must be used in conjunction with Highlight Volume Ratio.
Highlight Volume Ratio
Determines how much of the contrast in Highlight Volume is coming from the lift (left) or gain (right).
Shadow trim
Pull in og stretch out the absolute blacks for a gently roll off. The effect of the control varies based on the luminance range of the image.
Shadow volume
Reducing contrast in the lower end of the image to create get more textured blacks. Mimic the popular effect of playing the lift and gain against each other inside of a shadow key. Must be used in conjunction with Shadow Volume Ratio.
Shadow Volume Ratio
Determines how much of the contrast in Shadow Volume is coming from the lift (left) or gain (right).